How To Create A Share
Before you can share files or folders with other users on your network, you must make sure that File and Printer Sharing is enabled. You can do this by going to the Control Panel (Start, Control Panel) and selecting the Network Connections applet.
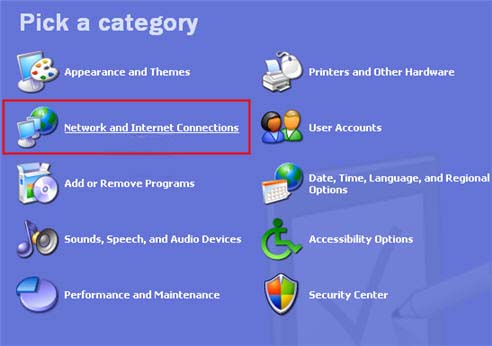
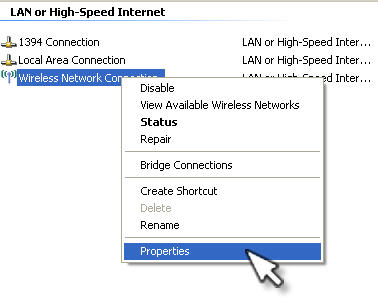
Right-click on your network connection and select Properties.
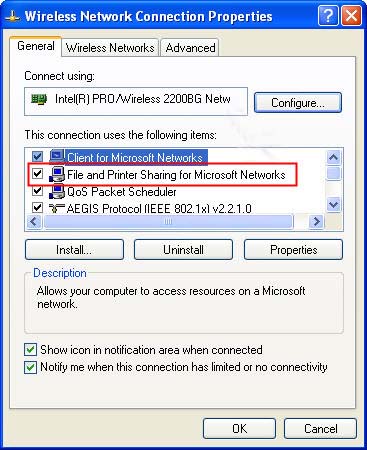
Make sure there is a check mark next to File and Printer Sharing for Microsoft Networks.
If you do not see this as an option, you may have to install this Windows component before you can share files. First, click on Install, then select Service, and check File and Printer Sharing fro Microsoft Networks.
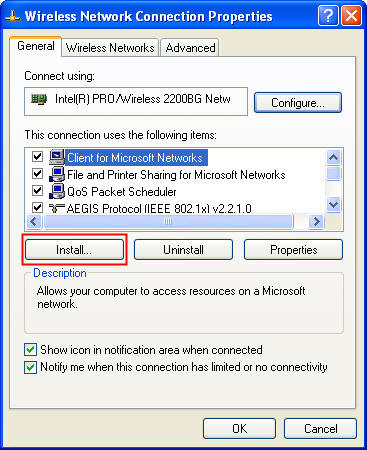
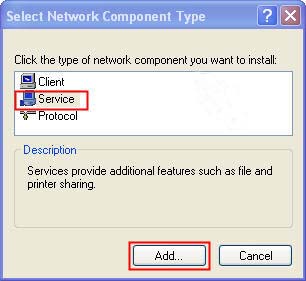
You may need to insert your Windows XP CD during the installation process.
Once File and Printer Sharing is enabled, you can share a folder by right-clicking on it and selecting Sharing and Security.
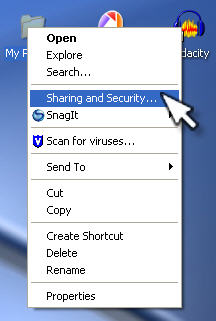
This will open up the Properties dialog box with the Sharing tab already selected. If this is the first time you are sharing files on this computer, you may see a link that will allow you to run the Network Setup Wizard (this link would be under the Network sharing and security section of the Sharing tab). Click on the link below that to begin sharing files without running the wizard. In the alert that pops up, select "Just enable file sharing" and click on OK.
The Network sharing and security section of the Sharing tab will change to display a checkbox where you can share the folder by selecting "Share this folder on the network."
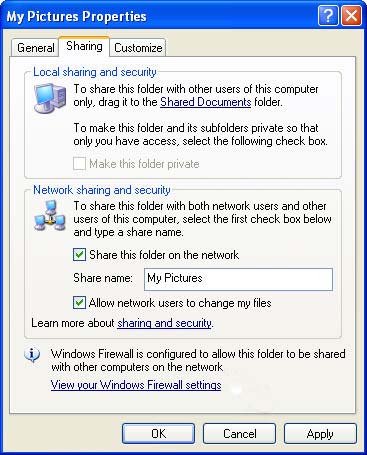
You can then enter a name to identify this folder on the network in the field below. If you want other people on the network to be able to change the files in this folder, make sure the check box next to Allow network users to change my files is selected. Once you are done sharing the folder, click on OK. The folder will now be accessible over the network.
By default, Windows XP has Simple File Sharing enabled. This feature allows other users on the network to access your shared files without having to know a password. If you want to set more specific permissions for the folders you want to share over the network, you will have to disable Simple File Sharing. To do this, first, open a Windows Explorer window by double-clicking on My Computer or My Documents. Next, select Tools, Folder Options, View and in the Advanced Settings section make sure Use simple file sharing is not selected.
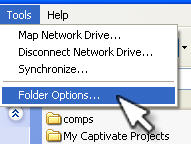
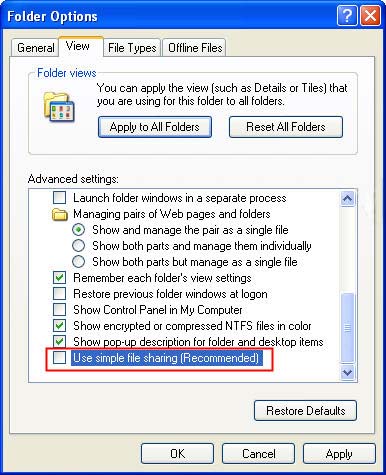
When Simple File Sharing is disabled, the Sharing tab in the Properties dialog box will look different.
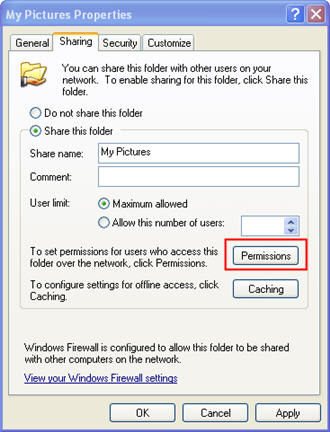
You will see a Permissions button which will allow you to specify the users who can have access to the folder.
How To Create A Share
Source: https://etc.usf.edu/techease/win/files-sharing/how-do-i-create-a-shared-folder-that-i-can-use-to-share-files-with-my-students/
Posted by: bestliffeent75.blogspot.com

0 Response to "How To Create A Share"
Post a Comment