How To Draw A Reindeer Easy Step By Step
Reindeer are incredible animals that live in a variety of colder climates around the world. They're rather distinctive in appearance with their fur and unique antlers.
They are also a symbol of festive Christmastime, as they are said to help Santa deliver presents around the world!
If you love these incredible creatures as much as many people do or you would like to get into the Christmas spirit with a reindeer drawing, then you're on the right guide for that!
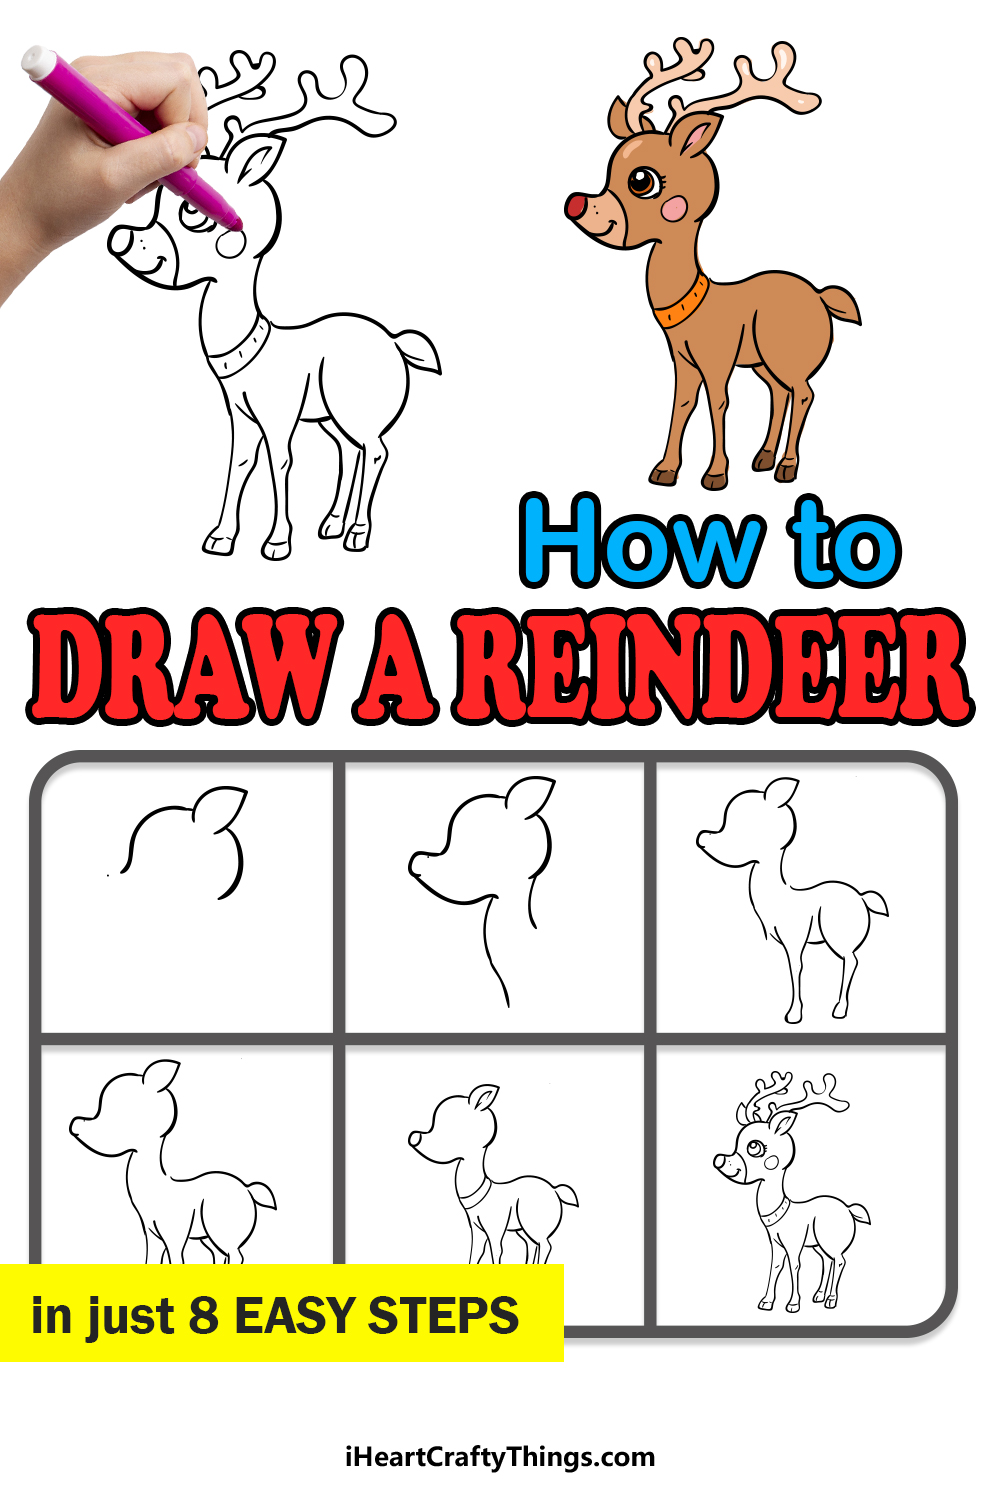
We made this guide on how to draw a reindeer in just 8 easy steps to show you how simple drawing one can be!
What's in this Blog Post
- How to Draw A Reindeer – Let's get Started!
- Step 1
- Step 2 – Next, keep drawing the face of the reindeer
- Step 3 – Next, start drawing the legs
- Step 4 – Draw the next legs
- Step 5 – Next, draw some smaller details
- Step 6 – Now, draw some antlers and other elements
- Step 7 – Draw some final elements and details for this step
- Step 8 – Now finish off your reindeer with some color
- Your Reindeer Drawing is Complete!
How to Draw A Reindeer – Let's get Started!
Step 1
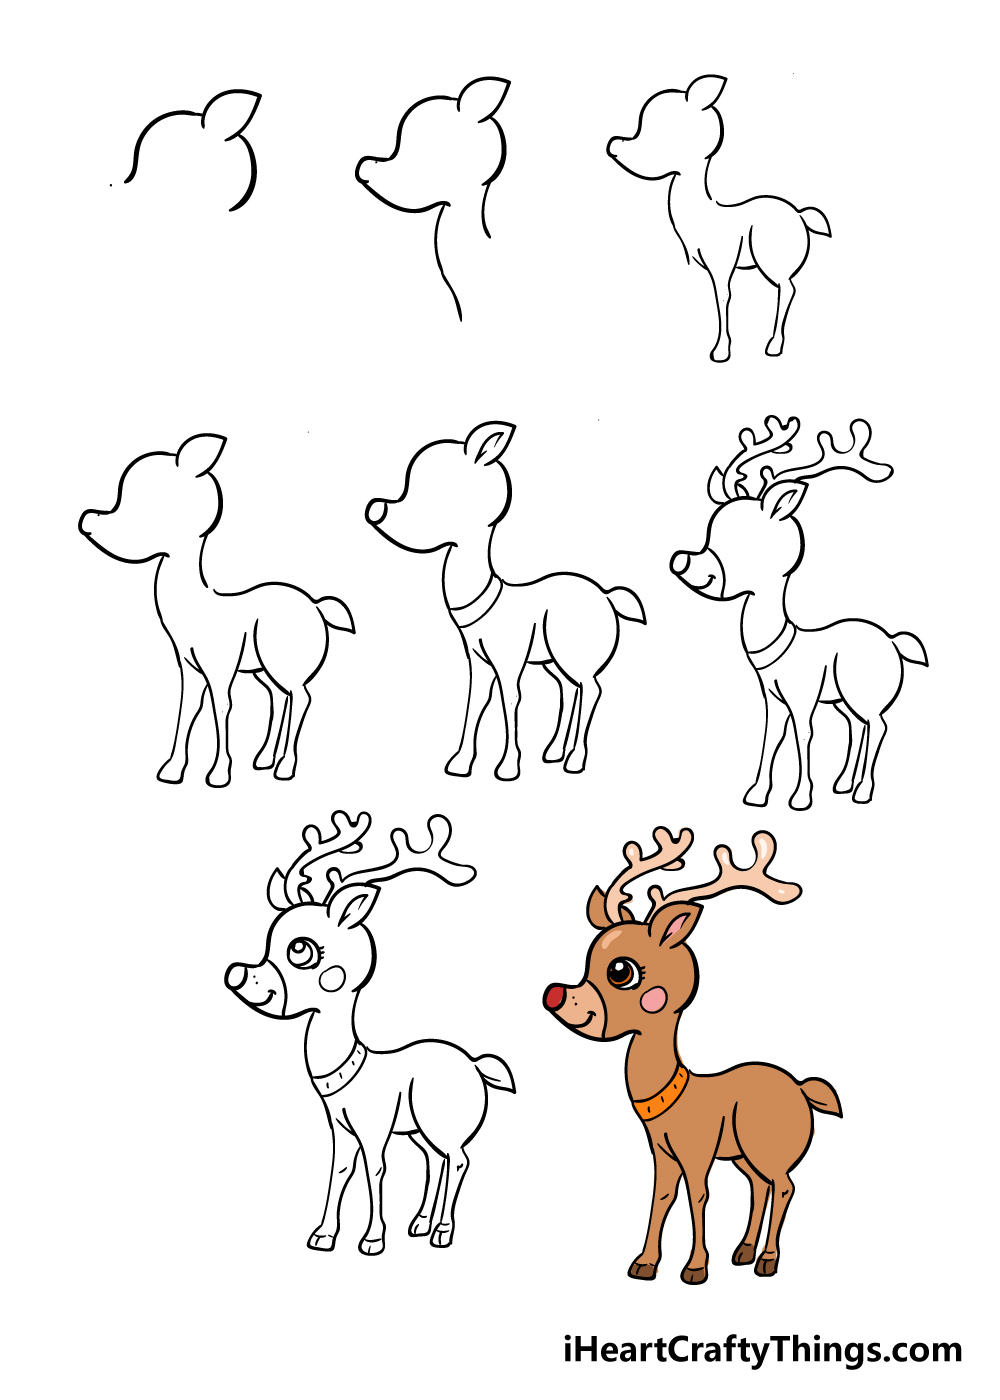
This guide on how to draw a reindeer has some tricky elements to it, so we will take it slow! For this first step, we will begin with the head of your reindeer.
The head will be quite round, as you can see in the reference image that we have provided. The ear will be drawn onto the head as a curved line with a point at the end.
With that portion of the head done, it's on to step 2!
Step 2 – Next, keep drawing the face of the reindeer
In this part of your reindeer drawing, we will continue drawing the face and the chest. Using the reference image as your guide, give the reindeer a pointy face with a rounded nose at the end.
Once you've drawn the face, you can draw a curved line coming down from it to create the chest of your reindeer.
Step 3 – Next, start drawing the legs
We will draw the back and first legs in this part of our guide on how to draw a reindeer. First, use a curved line going from the base of the neck for the back of the reindeer. Don't forget to add the tail!
Then, directly beneath the tail you can use some rounded lines for the hip of the reindeer. Directly below the hip, you can draw the thin, spindly leg.
There will then be a short line for the belly before the front leg which won't have the rounded hip of the back one.
Once you have it looking like our example in the reference image, you're ready for the next step.
Step 4 – Draw the next legs
Now that you have the first two legs of your reindeer drawing done, you can draw the other two now.
These will be on the other side of your reindeer, so while they will look quite similar to the previous legs you drew, they will be a bit smaller to show perspective.
Step 5 – Next, draw some smaller details
This step of our guide on how to draw a reindeer is all about some smaller details. First, you can draw a simple collar onto the neck of your reindeer using two simple, slightly curved lines.
Then, you can create a simple nose with another short line down near the tip of the face. Finally, some lines in the ear will help to show the inner ear.
Step 6 – Now, draw some antlers and other elements
A reindeer's most recognizable aspect is their antlers, so we had better add some to your reindeer drawing in this step!
The antlers start from between the ears and are made up of some curved lines with thick 'branches' jutting out. The reference image will help to illustrate what these should look like!
Before moving on to the next step, there are a few more details that you can add. First, draw a line down the muzzle of your reindeer, and then add a curved line for a smiling mouth within it. What other little details will you add to your drawing?
Step 7 – Draw some final elements and details for this step
Before we move on to the coloring of your reindeer, we shall add some final few elements and details.
First, you can draw a nice eye for your reindeer drawing by drawing a simple circle with another colored circle inside of it. You can also draw a circle near it to give the reindeer a rosy cheek!
Then, it's just a matter of adding some finishing touches. We have added some small lines to the collar and leg of our example drawing that just help to give some extra life to the drawing.
Before you finish off this step, you can add any details that you would like! This is a great way to get creative with your drawing, and you could add anything from a background to some extra elements.
How will you add to your drawing?
Step 8 – Now finish off your reindeer with some color
You have arrived at the final step of our guide on how to draw a reindeer! Your drawing is already looking great, but it would really be finished off nicely with some color.
We have shown you one way of coloring it in, but this is your chance to show us how creative you can be with your colors.
It might be a fun idea to use some more muted mediums such as watercolors for most of the reindeer, but then use a bright red colored pen or marker for the nose to make your reindeer look like the famous Rudolph.
If you drew a background for your reindeer, don't forget to color that in as well!
Your Reindeer Drawing is Complete!
We hope that this step-by-step guide on how to draw a reindeer was not only lots of fun but also easy for you to use.
We wanted this guide to show you that any drawing challenge can be made much easier if you have steps to follow and know what to do!
You should be very proud of the amazing drawing that you accomplished using this guide.
There is plenty more drawing fun in store for you on our website, as we have dozens of drawing guides like this one for you to enjoy!
Be sure to check in often, as we have plenty more that we will be uploading soon.
We would also love to see your wonderful reindeer drawing, so please be sure to share it on our Facebook and Pinterest pages once it's done!
How To Draw A Reindeer Easy Step By Step
Source: https://iheartcraftythings.com/reindeer-drawing.html
Posted by: bestliffeent75.blogspot.com

0 Response to "How To Draw A Reindeer Easy Step By Step"
Post a Comment